Restoring a historic home is one of the most rewarding endeavors a homeowner can undertake. Beyond merely owning property, taking on a historic residence makes you a steward of architectural heritage, craftsmanship, and local history. From hand-carved original trim and mouth-blown glass windowpanes to grand stone fireplaces, older structures possess a unique character that modern construction rarely replicates.
However, breathing new life into an aging property presents a distinct set of challenges. Unlike standard remodeling projects where you can simply strip down to the studs and rebuild using off-the-shelf modern materials, historic restoration requires a delicate balance. You must preserve the home’s authentic aesthetic while making it structurally sound, energy-efficient, safe, and comfortable for contemporary living.
Managing a full restoration demands meticulous planning, realistic budgeting, rigorous organization, and a clear understanding of the project sequence. Executing work out of order—such as refinishing original hardwood floors before fixing a leaking roof—can result in costly mistakes and permanent damage to irreplaceable historic features. This guide provides a comprehensive roadmap designed to walk you through every critical phase of managing a full historic home restoration, ensuring your project runs smoothly from initial assessment to final inspection.
Planning, Assessments, and Initial Site Work

Researching Property History and Local Architectural Guidelines
Before striking a single wall with a sledgehammer, your priority is understanding the regulatory and historical context of your home. Historic properties are often governed by local historic district commissions, state preservation offices, or national registries, each with its own set of rules regarding what can and cannot be altered on the exterior and interior.
Failing to secure the proper historic permits or using non-compliant materials can result in costly stop-work orders, steep fines, or orders to dismantle completed work. Start by visiting your local municipal planning office or historic commission to gather guidelines specific to your neighborhood.
- Research the property’s provenance: Gather original blueprints, historical photographs, deed records, and tax maps from local historical societies or county registries to understand the home’s original design and evolution.
- Determine your project scope: Clarify whether you are performing a strict preservation (maintaining existing historic fabric), a restoration (returning the home to a specific historical era), or a rehabilitation (adapting the property for modern utility while preserving historical features).
- Consult with historic preservation specialists: Hire a preservation consultant or architect experienced with heritage properties to perform a structural condition assessment and help navigate complex approval processes.
Understanding these boundaries early allows you to design a restoration plan that honors the home’s heritage while streamlining approval times with local regulatory boards.
Clearing the Property and Establishing Safe Workspace Boundaries
Once the regulatory pathway is clear, attention must turn to the physical site surrounding the structure. Over decades or centuries, historic homes often accumulate overgrown vegetation, invasive tree roots, and decaying auxiliary structures like unstable sheds or collapsed garages.
Overgrown trees whose branches overhang the roof can drop debris, trap moisture against historic wood siding, and cause severe structural damage during storms. Furthermore, underground root systems can compromise fragile historic foundations, clay drainage pipes, and stone retaining walls.
- Survey the perimeter: Identify hazard trees, dead limbs, and dense brush growing too close to the home’s envelope.
- Hire professional land clearing contractors: Bring in experienced specialists capable of removing thick brush, stumps, and intrusive roots without disturbing the surrounding soil stability or damaging original stone pathways.
- Establish heavy machinery zones: Designate clear drive paths for excavators and delivery trucks to ensure heavy vehicles do not compact the soil over delicate vintage utility lines or damage old-growth shade trees integral to the property’s setting.
Clearing the grounds properly establishes a safe, accessible perimeter for contractors, scaffolding, and material deliveries during the heavy phases of restoration.
Site Preparation, Waste Management, and Logistics
Setting Up Efficient On-Site Debris and Material Sorting
Restoring an older home generates a substantial volume of waste, ranging from crumbling plaster and rotted framing timber to non-functional legacy plumbing. Managing this waste efficiently is crucial for maintaining job-site safety, adhering to municipal waste regulations, and keeping the project on schedule.
Unlike modern construction sites where almost everything torn out is thrown away, historic restorations require meticulous sorting. You must separate unsalvageable trash from architectural elements that can be restored, re-used elsewhere in the building, or sold to architectural salvage yards.
- Secure roll-off dumpster rentals early: Rent appropriate container sizes based on your demolition schedule, ensuring you have designated containers for general construction debris and heavy masonry or plaster.
- Establish a temporary staging area: Create a dry, covered space—such as a temporary canopy or protected barn space—where vintage doors, original glass window sashes, brass hardware, and intact trim can be safely stored during demolition.
- Implement job-site safety protocols: Enforce safety measures for older building debris, which frequently contains hazardous materials like lead paint, horsehair plaster, or asbestos pipe insulation requiring specialized disposal procedures.
Having a structured disposal plan prevents job-site clutter, lowers workplace accident risks, and keeps heavy disposal trucks organized as demolition progresses.
Eco-Friendly Cleanups and Responsible Material Salvage
Demolition in a historic property should always be approached as a careful surgical dismantling rather than a wrecking-ball operation. Older homes contain high-quality materials that are virtually impossible to acquire today, such as old-growth heart pine, dense Douglas fir, hand-forged iron nails, and thick cast-iron plumbing fixtures.
Sorting through removed materials not only preserves history but can also offset project costs through recycling or resale.
- Divert scrap metal from landfills: Gather old copper water lines, lead flashing, iron radiators, and unrepairable brass plumbing fittings.
- Partner with metal recycling processing yards: Transport non-usable metal waste to local scrap recycling facilities to recoup cash funds that can be reinvested into your restoration budget.
- Salvage structural lumber: Carefully denail and stack vintage joists, studs, and floorboards removed during floor plan adjustments; these can be repurposed to patch damaged structural sections elsewhere in the house.
Responsible material management aligns with the sustainability ethos inherent in historic preservation—the greenest building is often the one that is already built.
Structural Integrity, Exterior, and Water Protection
Repairing the Roof and Overhead Envelope
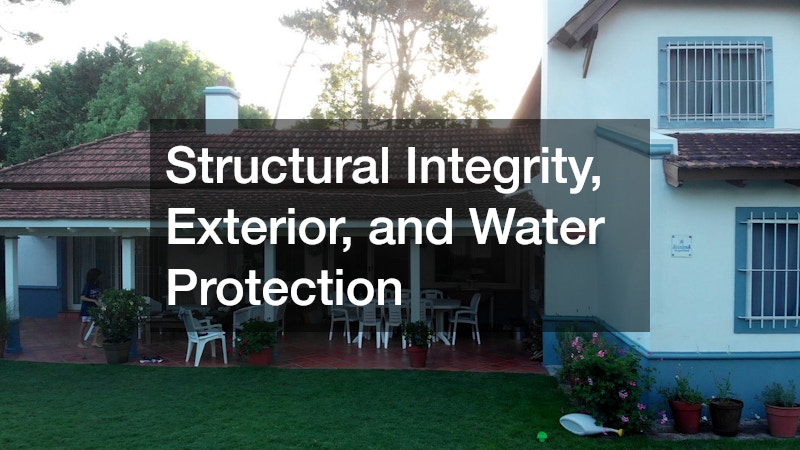
A historic home cannot be saved until its upper envelope is completely watertight. Water infiltration is the single greatest threat to structural timbers, lathe-and-plaster ceilings, original wallpaper, and subflooring. Roof repairs must always take top priority before any interior cosmetic or utility work begins.
Historic roofs often feature specialized materials such as slate, cedar shakes, copper standing seams, or clay tiles. Repairing or replacing these surfaces requires craftsmanship beyond standard modern shingle installation.
- Inspect framing and decking: Examine rafters and tongue-and-groove roof boards for sagging, dry rot, insect infestation, or historic fire damage from old chimney fires. Call deck builders for support.
- Select qualified roofing companies: Hire specialty roofing contractors who possess documented experience working with heritage materials, traditional copper flashing, and historic roof venting techniques.
- Restore original rainwater systems: Repair or rebuild historic built-in box gutters, copper downspouts, and decorative conductor heads to ensure heavy rain is efficiently directed away from delicate masonry and wood siding.
Investing in high-quality craftsmanship for your roof protects every subsequent dollar you spend inside the home.
Mitigating Existing Moisture Issues and Preventing Future Leaks
Because many historic homes were built before modern perimeter drainage, vapor barriers, and sump pumps were invented, damp basements and chronic moisture infiltration are common issues. Unchecked moisture leads to timber decay, crumbling lime mortar, and hazardous mold growth.
Remediating existing moisture damage requires specialized techniques that respect historic construction methods. For example, applying modern Portland cement over historic, soft brick can trap moisture inside the brick and cause it to spall during freeze-thaw cycles.
- Remediate historical flooding and leaks: Enlist certified water damage restoration teams to thoroughly dry out saturated structural timbers, safely remove biological growth, and stabilize damp masonry using commercial dehumidification equipment.
- Improve exterior grading: Slope ground soil away from the foundation walls at a rate of six inches over the first ten feet to naturally direct surface water away from the building perimeter.
- Repoint stone and brick foundations using breathable mortars: Use traditional high-lime mortar mixes that allow moisture to evaporate through the joints rather than forcing water through historic bricks.
Eliminating indoor dampness creates a healthy living space, stabilizes structural framing, and prepares interior spaces for climate control installation.
Modernizing Utilities and Thermal Comfort
Upgrading Mechanical and Fuel Systems
Keeping an older home warm during cold seasons is essential, both for occupant comfort and to prevent standing plumbing lines from freezing during construction. However, historic properties often rely on aging, inefficient heating systems, such as gravity-feed hot water boilers, underground oil tanks, or conversion burners.
Transitioning a historic property to modern efficiency requires strategic decisions about temporary heating during construction versus long-term mechanical installations.
- Maintain temporary job-site heat: Arrange for regular heating oil delivery to keep existing boiler systems operational during winter construction, protecting freshly applied plaster, paint, and original wood trim from freezing temperature shifts.
- Inspect legacy fuel lines and storage tanks: Test underground fuel tanks for leaks and inspect supply pipes for corrosion to prevent environmental contamination and expensive oil spills.
- Plan the transition to modern high-efficiency fuel systems: Evaluate options for switching to modern condensing boilers, heat pumps, or natural gas lines while retaining or restoring charming cast-iron radiators.
Keeping the home at a stable temperature year-round prevents structural expansion and contraction, protecting delicate original woodwork throughout the restoration process.
Retrofitting Modern Climate Control Without Compromising Historic Interiors
Installing modern air conditioning in a home built long before central climate control existed is one of the greatest technical challenges in historic restoration. Traditional homes lack the large wall cavities, drop ceilings, and chase spaces required for bulky, modern rectangular ductwork.
Cutting through historic plaster walls, carved ceiling medallions, or antique floor joists to install standard ducts ruins historic fabric and can compromise structural integrity.
- Select non-invasive cooling technology: Work with an experienced AC installation company specializing in high-velocity mini-duct systems or multi-zone ductless mini-splits that require only small, flexible tubing routed through existing wall cavities or closets.
- Utilize unseen chases for line routing: Route refrigerant lines, electrical conduit, and condensate drains through disused chimney flues, back closets, or false corners to keep equipment out of main living sightlines.
- Blend supply vents into original architecture: Use custom wooden, brass, or painted iron vent covers that match original floor grilles or baseboard details instead of modern plastic vents.
Thoughtful HVAC design allows you to enjoy modern temperature and humidity control without sacrificing the historic look and feel of your interior spaces.
Furniture Storage and Exterior Living Upgrades

Protecting Belongings and Interior Antiques During Heavy Construction
Restoration work generates huge quantities of fine plaster dust, vibration, and debris. Attempting to store original light fixtures, antique furniture, or delicate architectural salvage inside active construction zones virtually guarantees damage.
Clearing out working spaces completely ensures that work crews can move freely, operate ladders safely, and work without risking damage to valuable historic artifacts or personal possessions.
- Inventory and clear workspace rooms systematically: Label, photograph, and remove all loose historic elements, including original brass door hardware, glass crystal knobs, light sconces, and mantelpieces, before plastering or painting begins.
- Hire professional moving and storage companies: Utilize full-service movers experienced in handling delicate antiques and heavy vintage items to transport fragile belongings to secure, climate-controlled off-site storage units.
- Protect non-removable historic features: For items that cannot be moved—such as grand staircases, built-in mahogany bookcases, or marble hearths—construct rigid wooden protective boxes lined with high-density foam and sealed with plastic sheeting.
Protecting these elements prevents heartbreaking loss or expensive restoration of items that were intact before the project started.
Designing Complementary Outdoor Living Spaces
With the main home structurally sound, watertight, modernized, and beautifully restored, attention can shift to enhancing outdoor living spaces. Adding a deck, porch, or patio allows you to enjoy your historic property’s grounds, but new exterior structures must visually harmonize with the main building’s architectural period.
Preparing for a Full Home Restoration
Managing a full historic home restoration project is a journey that requires equal parts patience, preparation, and passion. Older homes were constructed using materials, methods, and architectural proportions that are rarely matched in modern home building. By taking the time to research your home’s history, securing the right permits, assembling a team of skilled heritage contractors, and adhering to a logical phase-by-phase execution plan, you can protect your investment and preserve a piece of living history.