A major renovation is one of the most exciting journeys a homeowner can undertake, but without proper preparation, it can quickly turn into a chaotic experience. Transforming your living space requires more than just picking out finish materials and signing contracts. The smooth execution of a large-scale project rests almost entirely on the groundwork you lay before a single hammer swings or a sheet of drywall comes down.
When homeowners rush into demolition without establishing detailed logistics, small oversights quickly compound into major structural setbacks, bloated budgets, and intense household friction. Taking the time to prepare your home, your schedule, and your daily environment prevents expensive mistakes, unnecessary delays, and the overwhelming stress that often accompanies home construction.
By approaching your upcoming project with a clear logistical strategy, you can protect your financial investment, keep your household running smoothly, and ensure that the finished result matches your original vision. This guide provides an actionable roadmap to prepare your physical space, your budget, and your daily routine for a seamless home transformation.
Establishing the Scope and Trade Sequencing Strategy

Planning a comprehensive home renovation demands a clear understanding of construction choreography. A successful build relies on scheduling individual trades in a precise order so that foundational systems are updated, inspected, and closed in before delicate surface finishes are applied. Skipping a step or bringing in trades out of order frequently leads to costly rework, damaged materials, and unnecessary delays.
Establishing a Realistic Construction Timeline
Before work begins, build a comprehensive master schedule with your general contractor that accounts for material lead times, local permit approval windows, and unexpected structural surprises. Major interior transformations often hit bottlenecks when custom materials are ordered late or when municipal building inspectors are delayed. Creating a visual project roadmap with built-in buffers prevents minor setbacks from throwing off your entire completion date.
To create a buffer against common construction slowdowns, consider these essential scheduling practices:
- Confirm exact lead times for long-tail items, such as custom cabinetry, structural beams, and specialty plumbing fixtures, before locking in demolition start dates.
- Build two to three floating contingency weeks into your overall project schedule to absorb permit delays, bad weather hold-ups, or hidden framing repairs uncovered behind old walls.
- Establish hard deadline milestones for trade handoffs, ensuring one crew completely finishes their rough-in work and clears building inspections before the next trade mobilizes on-site.
- Set up weekly check-in meetings with your project lead to review upcoming milestones and verify that all scheduled sub-contractors remain aligned with the master timeline.
Auditing Existing Mechanical Systems Early
A common pitfall during home updates is neglecting the vital mechanical systems hidden behind your walls. Before cosmetic work or structural shifts take place, conduct a thorough assessment of your home’s heating, cooling, and ventilation infrastructure. Discovering that your system cannot handle expanded square footage after drywall is already installed creates massive financial friction and unexpected delay.
Bringing in an experienced HVAC contractor early in the planning phase allows you to evaluate your current ductwork routing, airflow capacity, and unit age. If your project involves knocking down load-bearing walls or reconfiguring room boundaries, existing supply and return lines may need to be rerouted entirely. Addressing these requirements early ensures that any necessary ac repairs or system upgrades are integrated into your initial framing plans rather than tacked on as emergency change orders later in the process. Taking time to evaluate system capacity protects your long-term energy efficiency and guarantees consistent climate control across every newly configured living area.
Safeguarding Your Home Assets Against Construction Damage

Construction zones generate incredible amounts of dust, grit, and heavy foot traffic that can ruin non-renovated portions of your property in a matter of days. Protecting the surrounding areas of your home from accidental damage requires intentional, physical barriers set up well before workers arrive.
Implementing Professional Dust Control Systems
Fine drywall dust and masonry grit have a unique ability to travel through the smallest cracks, infiltrating closets, electronics, and secondary living spaces. Establishing sealed, negative-pressure containment zones keeps construction mess contained strictly within the active work site and keeps the rest of your home breathable.
- Set up floor-to-ceiling heavy plastic zip-walls at all doorways and open passageways leading from the construction zone into your clean living areas.
- Seal off all return air vents within the active work space to prevent airborne dust from being pulled into your furnace and redistributed throughout the entire house.
- Lay temporary protective floor runner materials along primary walking paths from the home entry point directly to the project perimeter.
- Run portable air scrubbers with HEPA filtration inside active workspaces to capture microscopic silica and drywall particles at the source.
- Establish daily jobsite cleanup expectations with your site supervisor so that sweeping compound and vacuuming routines happen at the end of every work shift.
Protecting Unchanged Floor Finishes From Heavy Foot Traffic
Existing flooring in adjoining hallways and entryways takes a severe beating during a remodel as tradespeople carry heavy tools, lumber, and debris in and out every day. Standard drop cloths easily slide out of position and offer virtually no protection against dropped hammers, gravel, or heavy equipment impact.
If your project involves a new hardwood flooring installation in one section of the house while preserving original surfaces elsewhere, guard those existing floors rigorously. Layering breathable floor protection membranes topped with thick masonite sheets shields vulnerable wood surfaces from impact and scratches. Professional flooring contractors will always insist on securing these protective pathways before staging heavy materials or rolling heavy machinery across your entryways. Investing in proper floor protection upfront eliminates the costly need for floor refinishing or replacement once the main construction project wraps up.
Managing Material Deliveries, Storage, and Quality Inspections

The arrival of heavy finish materials represents a key turning point in your project. Managing deliveries carefully prevents site clutter, protects fragile components, and ensures materials are ready for installation the moment trades arrive on site.
Strategic Staging and On-Site Storage
When large shipments of stone, tile, and cabinetry arrive on-site, having a designated, climate-controlled staging area prevents chaos. Storing heavy materials in active workspaces creates safety hazards and forces tradespeople to constantly move heavy boxes out of their way to get actual work done.
Recommended Staging Flow:
Delivery Truck $\rightarrow$ Dry Garage / Clean Staging Room $\rightarrow$ Inspection Zone $\rightarrow$ Active Work Site (Just-in-Time)
Clear out a clean garage bay or an adjacent, unused room close to an exterior entry point to serve as your staging hub. Ensure the subfloor in your staging space is entirely level and capable of supporting concentrated weight, particularly when storing dense pallets of tile, stone, or lumber. Keeping materials organized by room and phase keeps the main workspace clear and allows installation crews to locate required components instantly. Additionally, maintaining a consistent temperature in your storage area allows wooden elements and custom millwork to acclimate properly before installation, preventing post-install warping or expansion.
Inspecting Fragile Surfaces Upon Delivery
Never allow boxed or crated finish materials to sit unopened in storage until the day of installation. Uncrate, clean off, and thoroughly inspect every surface product the moment it is unloaded from the delivery vehicle. Manufacturing defects or shipping damage discovered on installation day can freeze your timeline for weeks while replacements are backordered.
When taking delivery of a custom kitchen countertop or prefabricated bathroom surfaces, examine all edges, corners, and face planes under direct, sharp light. Natural stone and composite materials such as cultured marble can develop subtle stress fractures during transit that might go unnoticed until installation day. Catching chips, hairline cracks, or color inconsistencies immediately gives you time to order replacement pieces without bringing the entire construction timeline to an unexpected halt. Documenting delivery inspections with photographs also ensures smooth claims processing with suppliers if freight damage occurs.
Executing Surface Preparation and Coating Schedules
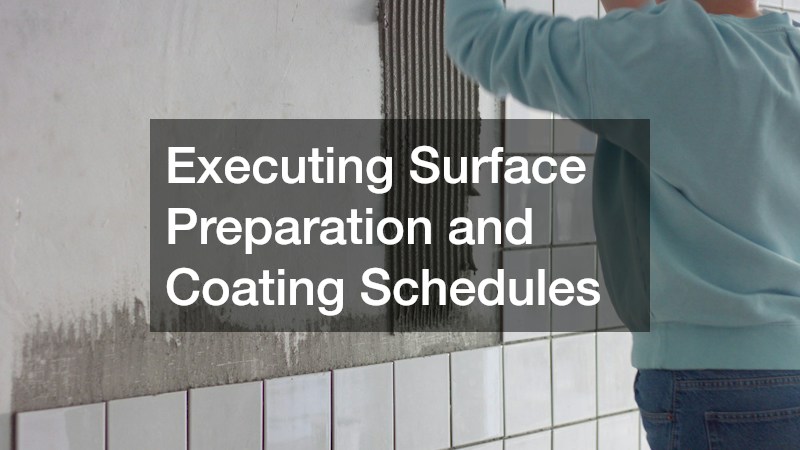
Applying interior finishes requires strict adherence to sequencing, climate control, and surface preparation. Attempting to rush wall coatings or surface prep while dusty trades are still working guarantees compromised aesthetic results and poor product performance over time.
Coordinating Wall Preparation and Interior Painting
Achieving a flawless wall finish requires completing messy drywall sanding and structural prep before any fine finish materials or floor coverings are unpacked. Drywall dust airborne in a room will settle directly onto wet paint, leaving a coarse, sandpaper-like texture on your freshly finished walls.
Schedule your interior painting after drywall taping, mudding, and broad sanding are completely finished, but prior to laying down delicate floor coverings. Applying primer and base coats during this window allows painters to cover broad wall areas quickly without spending excessive hours masking new floors. Once the messier rough-in steps are wrapped up, bringing in professional painting contractors to complete the final topcoats ensures clean lines around fresh trim, baseboards, and casing. Proper wall curing times between coats also prevent moisture trapping and ensure rich, uniform color depth.
Off-Site Finishing for Architectural Metals and Trim
Not all paint applications should happen inside the active home environment. Architectural metalwork, iron stair railings, radiator covers, and custom metal trim benefit significantly from being prepared and finished off-site in controlled shop environments where temperature, humidity, and dust can be precisely managed.
- Remove existing metal fixtures and railings during the initial demolition phase so they can be transported to a specialized spray facility.
- Utilize a dedicated metal painting service to apply high-durability epoxy or powder coatings that resist scratching and chipping far better than field-applied paint.
- Schedule the reinstallation of cured metal features during final trim-out, long after dusty drywall work and heavy construction activities have completely ceased.
- Inspect all reinstalled metal elements for secure fastening and pristine surface finish before signing off on final hardware installations.
Navigating Final Trade Handoffs and Quality Control
The transition from rough construction to final polish is the most delicate phase of a project. Managing trade handoffs efficiently keeps the work moving smoothly toward the finish line while protecting newly installed features from late-stage damage.
Subfloor Preparation and Modern Flooring Applications
Installing final floor coverings demands absolute precision regarding subfloor smoothness, cleanliness, and moisture testing. Laying new materials over uneven subfloors leads to squeaks, seam separation, unlocked joins, and premature wear across high-traffic paths.
When selecting resilient materials like luxury vinyl flooring for high-traffic zones, basements, or utility areas, the underlying subfloor must be entirely level, dry, and free of construction debris or residual adhesives. Skilled flooring contractors will meticulously grind down high spots, fill low areas with self-leveling underlayment, and perform moisture tests before laying down a single plank. Rushing this prep phase compromises the locking mechanisms of modern floating floors and voids manufacturer warranties. Ensuring proper underlayment selection also provides noise dampening and thermal insulation beneath your new floors.
Establishing Punch Lists and Specialist Sign-Offs
As your renovation nears completion, transition from broad oversight to meticulous detail verification. Creating a structured punch list system ensures that minor flaws are caught and systematically corrected before final payments are disbursed to your trade team.
Work through each completed room systematically alongside your general contractor, making written notes of any micro-flaws, unsealed seams, misaligned cabinet doors, or incomplete hardware installs. Coordinate with your painting contractors to perform targeted touch-ups on walls and trim where subsequent trade work may have left minor scuffs or dings. Walk through every plumbing, electrical, and mechanical feature, testing every switch, outlet, faucet, and cabinet soft-close hinge to ensure your updated space functions as flawlessly as it looks. Taking a structured, detail-oriented approach to your final walkthrough provides complete confidence that every phase of your project has been executed to the highest standard.
Properly preparing your home for a major renovation transforms what could be a stressful, unpredictable ordeal into an organized, manageable process. By prioritizing upfront logistics, establishing clear trade schedules, protecting existing home assets, and inspecting materials upon delivery, you shield your budget and your sanity from unexpected disruption.
Clear communication with your project team, paired with rigorous protection protocols, keeps your household safe and comfortable throughout construction. A thoughtful, proactive preparation strategy ensures that your construction project proceeds efficiently from initial demolition all the way to the final walkthrough, delivering a beautifully renovated home that fulfills your expectations for years to come.